EXPLORIST.life Ford Transit 540Ah – 3k 24V Inverter – 580W to 1700W Dual Solar Array
From: $0.00
This DIY electrical system can be customized to your needs. The default selections are the selections as shown in the video tutorial. Batteries are not included and should be selected separately.
Click the arrow next to each kit name for specifics on what is included in the kit.
Description
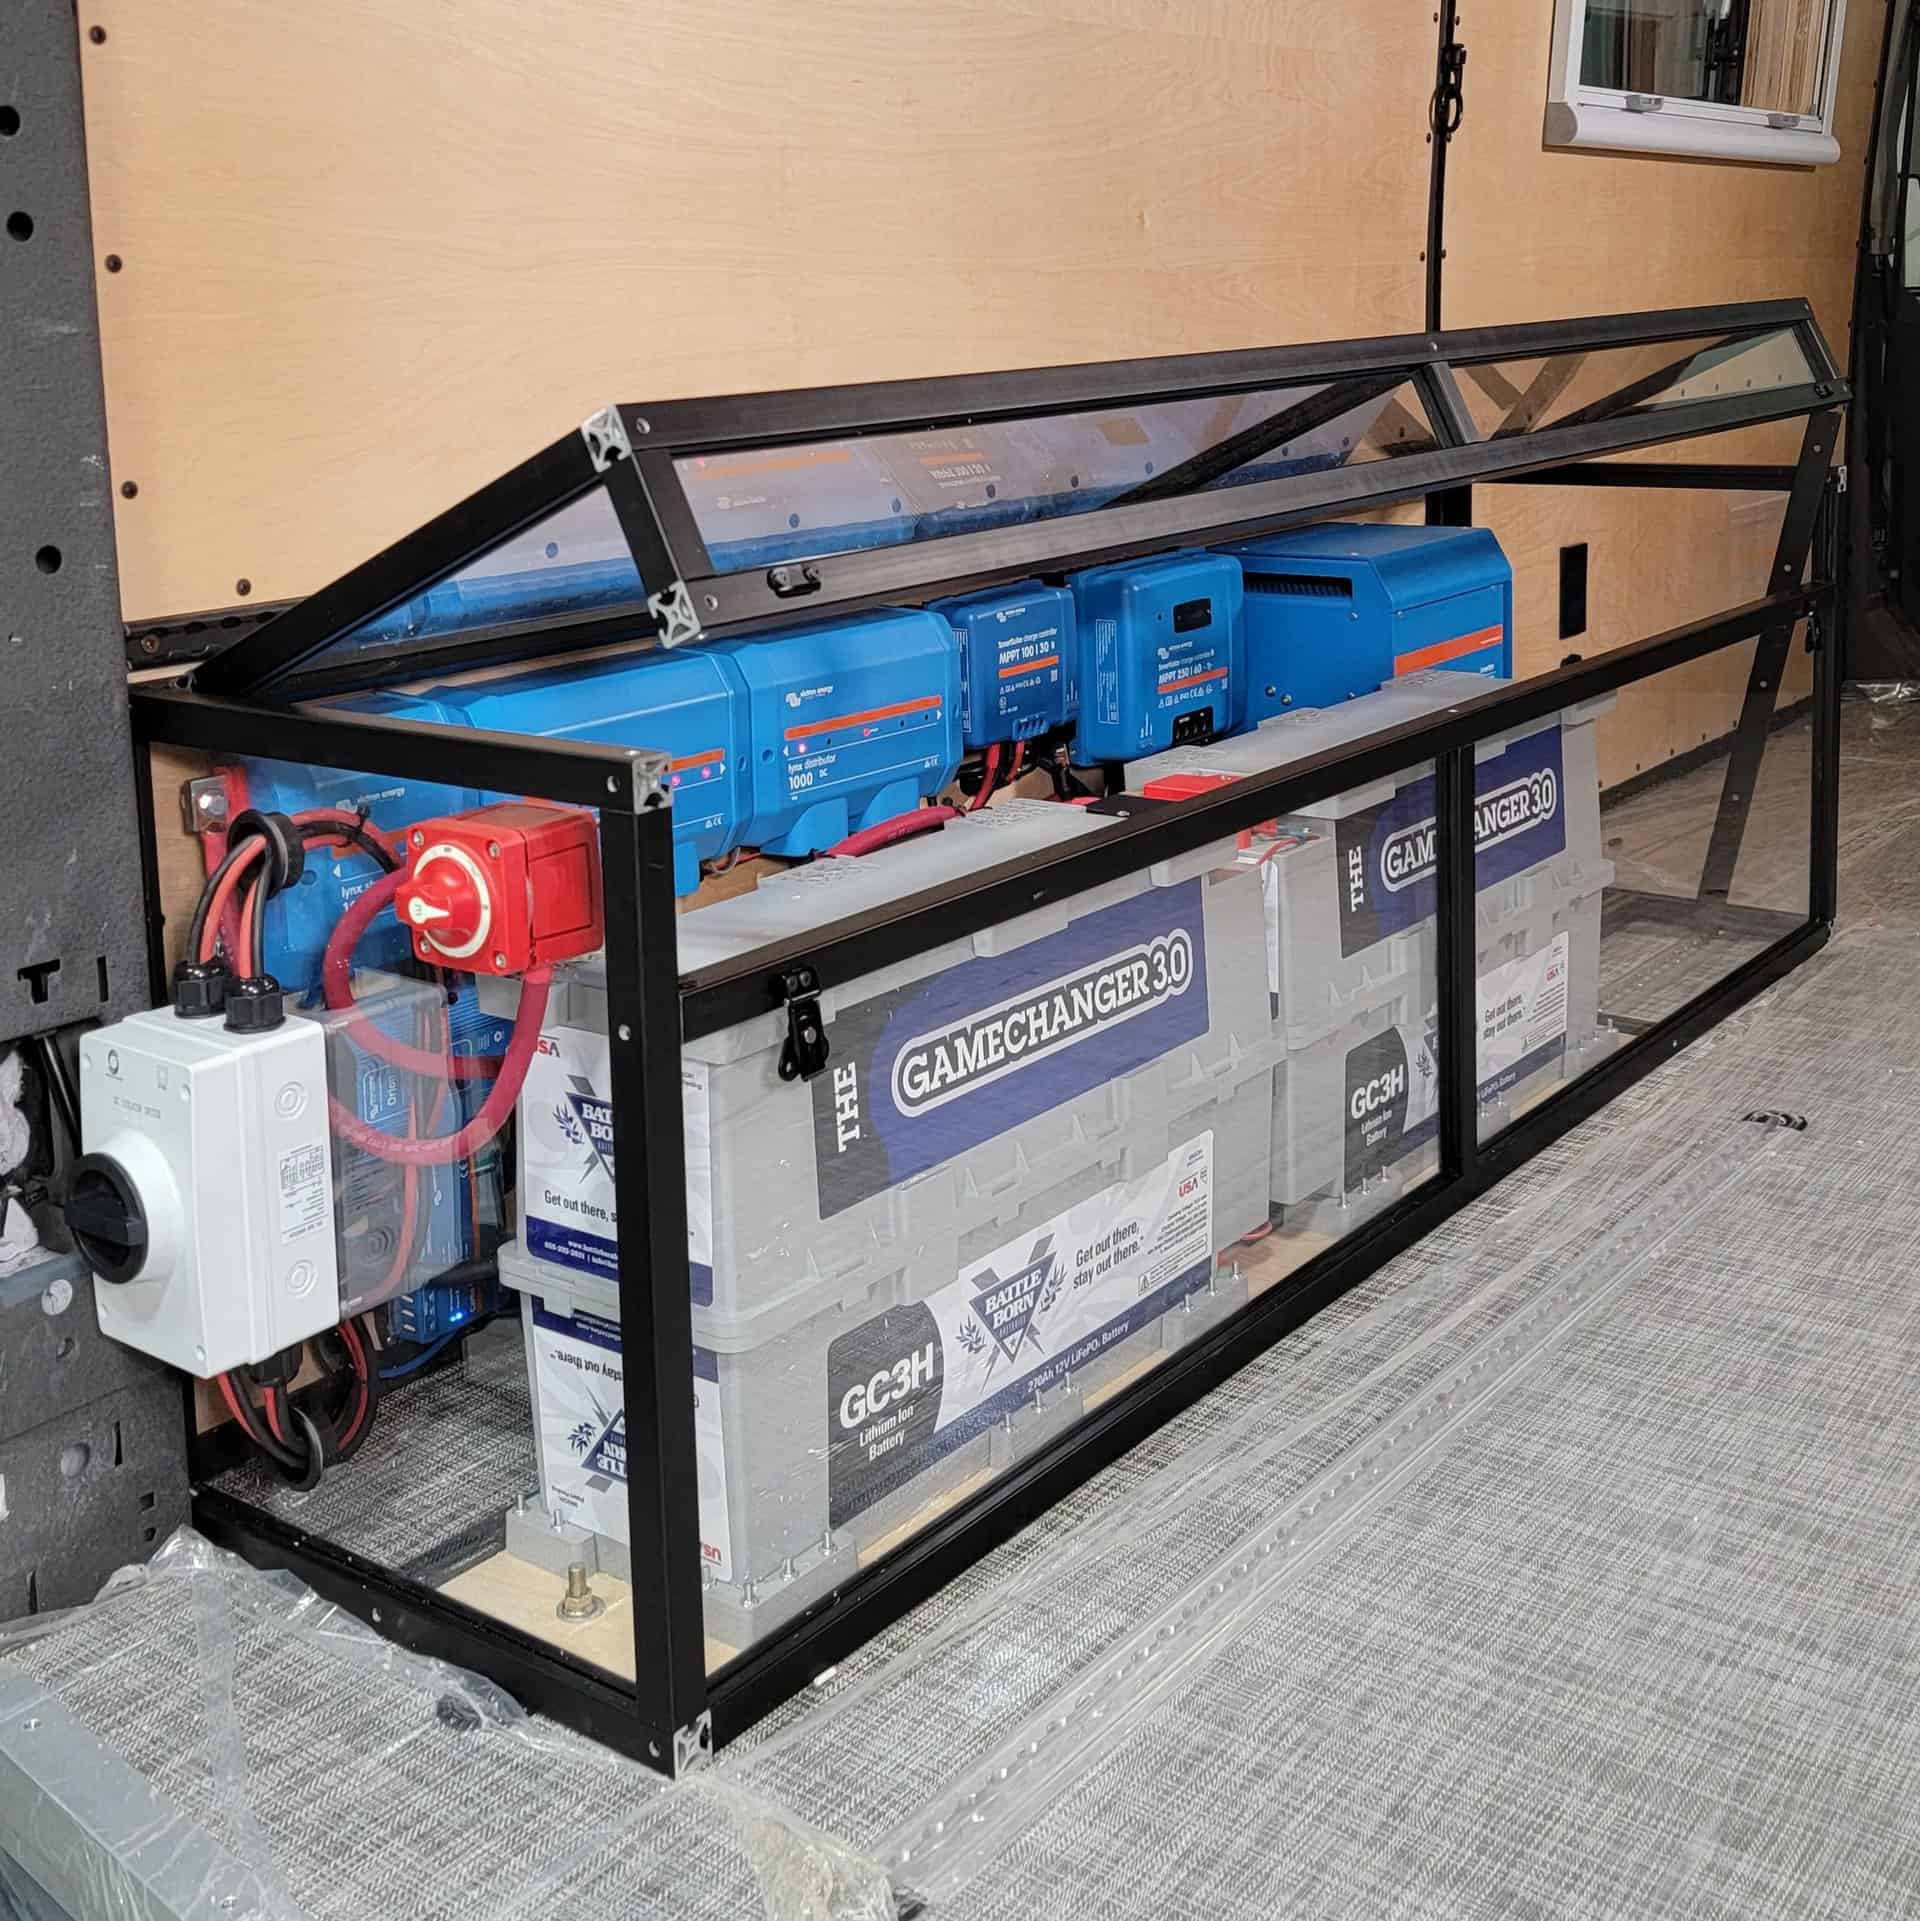
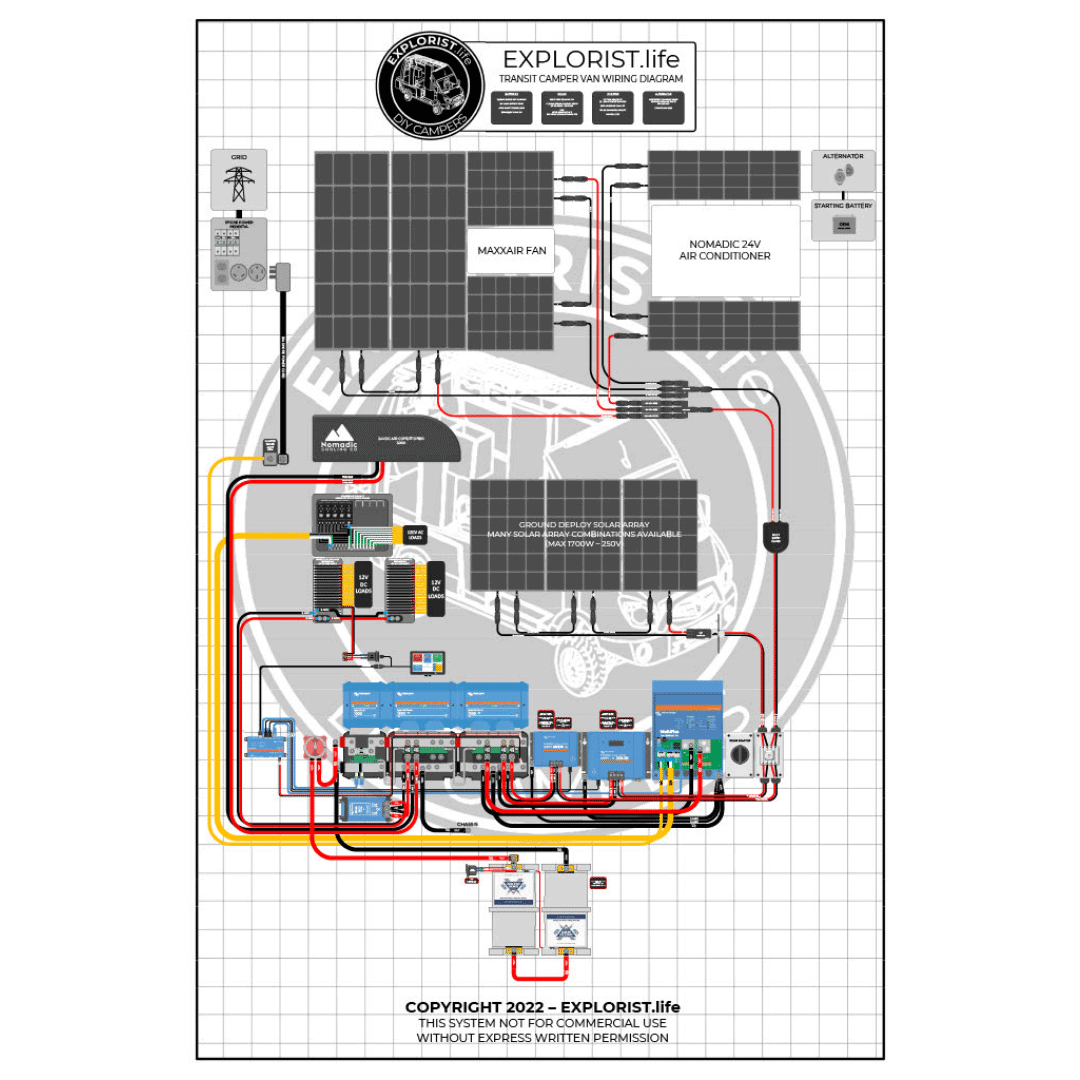
This is a complete DIY camper electrical system wiring kit as shown in our 2021 Ford Transit camper van in our video tutorial below. This system features 540Ah of Battle Born lithium batteries, a Victron 24/3000 Inverter/Charger, Dual Victron Orion 12-24-15 Chargers, and 580W of solar on a custom-designed roof rack from Unaka Gear Co. Up to an additional 1700W of ground deploy solar can also be added from the second MPPT Charge Controller
BATTERY OPTIONS:
The following battery options are suitable for this system . The required minimum quantity is listed below:
| COMPONENT | QUANTITY | LINK TO BUY |
| Suitable Battery Options (minimum 400Ah @12V/200Ah @24V required): | ||
| Battle Born 100Ah 12V LiFePO4 Deep Cycle Battery | 4+ | CLICK HERE TO BUY |
| Battle Born 100Ah GC2 12V LiFePO4 Deep Cycle Battery | 4+ | CLICK HERE TO BUY |
| Battle Born 270Ah 12V LiFePO4 Deep Cycle GC3 Battery | 2+ | CLICK HERE TO BUY |
| Battle Born 270Ah 12V LiFePO4 Deep Cycle Heated GC3 Battery | 2+ | CLICK HERE TO BUY |
This is the complete DIY camper electrical wiring kit as shown in the following video:
Dual Orion Alternator Charging:
Click to Expand System Charging/Programming Parameters
SmartSolar MPPT 100/30 Settings:
- Battery:
- Battery Voltage: 24V
- Max charge current: 30A
- Charger enabled: On
- Battery preset: User Defined
- Expert Mode: On
- Absorption voltage: 28.8V
- Float voltage: 27.2V
- Equalization voltage: 28.6V
- Re-bulk Voltage offset: 0.20V
- Absorption duration: Adaptive
- Maximum absorption time: 1h 0m
- Tail Current: 2.0A
- Equalization current percentage: 25%
- Automatic equalization: Disabled
- Equalization stop mode: Fixed time
- Equalization duration: 1h 0m
- Manual Equalization: DO NOT PRESS
- Temperature compensation: Disabled
- Low-temperature cut-off: Disabled
- Load Output: Leave everything as default
- Streetlight: Leave everything as default
- TX port function: Leave everything as default
- RX port function: Leave everything as default
- VE.Smart networking: Create VE.Smart Network
SmartSolar MPPT 250/60 Settings:
- Battery:
- Battery Voltage: 24V
- Max charge current: 60A
- Charger enabled: On
- Battery preset: User Defined
- Expert Mode: On
- Absorption voltage: 28.8V
- Float voltage: 27.2V
- Equalization voltage: 28.6V
- Re-bulk Voltage offset: 0.20V
- Absorption duration: Adaptive
- Maximum absorption time: 1h 0m
- Tail Current: 2.0A
- Equalization current percentage: 25%
- Automatic equalization: Disabled
- Equalization stop mode: Fixed time
- Equalization duration: 1h 0m
- Manual Equalization: DO NOT PRESS
- Temperature compensation: Disabled
- Low-temperature cut-off: Disabled
- Load Output: Leave everything as default
- Relay: Leave everything as default
- Streetlight: Leave everything as default
- TX port function: Leave everything as default
- RX port function: Leave everything as default
- VE.Smart networking: Create VE.Smart Network
Lynx Shunt Settings:
- Battery Capacity: 270Ah
- Charged Voltage: 28.6V
- Tail current: 4%
- Charged Detection Time: 3m
- Peukert exponent: 1.05
- Charge Efficiency Factor: 99%
- Current Threshold: .10A
- Time-to-go averaging period: 3m
- Synchronise SoC to 100%: DO NOT PRESS
- Zero current calibration: DO NOT PRESS
Note: There are a TON of things you can change/add in the Cerbo GX. It’s basically a fully functioning computer. The items above will get it so that your batteries are charging properly and your monitoring is all set up, but I encourage you to dive into the Cerbo GX and learn it’s full capabilities.
Multiplus Settings are Pre-Set from Battle Born
Additional information
Battery Bank Wiring Kit
| Weight | 9.5 lbs |
|---|---|
| Dimensions | 10 × 10 × 2 in |
| Select Your Battery Bank | 4 Batteries – 4/0 Wire, 2 Batteries – 4/0 Wire, 4 Batteries – 2/0 Wire, 2 Batteries – 2/0 Wire, 2 Batteries – 1/0 Wire, Extended 24" 2 Battery Bank – 4/0, Extended 24" 2 Battery Bank – 2/0, Extended 24" 2 Battery Bank – 1/0, Busbar Wired Battery Bank – 1 Battery – 1/0 |
| Wiring Kit Application | Battery Bank |
Lynx Distributor Wiring Kit
| Weight | 14 lbs |
|---|---|
| Dimensions | 12 × 12 × 6 in |
| Lynx Distributor Wiring Kit Options | Lynx Distributor – 1/0 Wire – BMV-712, Lynx Distributor – 1/0 Wire – Lynx Shunt |
| Wiring Kit Application | Distribution Panel, Fuse Panel/Breaker Box |
Victron Lynx Distributor (M8)
| Weight | 5 lbs |
|---|---|
| Dimensions | 16 × 7.5 × 3.5 in |
Second Lynx Distributor Mounting Hardware (included)
| Weight | 0.1 lbs |
|---|---|
| Dimensions | 2 × 2 × 0.2 in |
Victron Lynx Shunt VE.Can
| Weight | 3 lbs |
|---|---|
| Dimensions | 12 × 12 × 6 in |
| Current Rating | 1000Adc continuous |
| Battery Bank Voltage | 12V, 24V, 48V |
Inverter/Charger Wiring Kit
| Weight | 13 lbs |
|---|---|
| Dimensions | 10 × 10 × 4 in |
| Select Your Inverter/Charger: | Victron MultiPlus 24/3000/70-50 120V |
| Wiring Kit Application | Inverter/Charger |
Victron Multiplus 24/3000 70-50 120V
| Weight | 40 lbs |
|---|---|
| Dimensions | 14.3 × 10.2 × 8.6 in |
| Shore Power Amperage | 30A |
| Battery Bank Voltage | 24V |
| Programming | Full System Remote Programming (+$99.00), Battle Born LiFePO4 Batteries (+$60.00), Dakota LiFePO4 Batteries (+$60.00), EG4 LiFePO4 Batteries (+$60.00), Epoch LiFePO4 Batteries (+$60.00), Expion 360 LiFePO4 Batteries (+$60.00), Relion LiFePO4 Batteries (+$60.00), Renogy LiFePO4 Batteries (+$60.00), Rich Solar LiFePO4 Batteries (+$60.00), Victron Smart NG LiFePO4 Batteries (+$60.00), Other/Semi-Universal LiFePO4 Batteries (+$60.00), Self Programmed – ADD Interface MK3-USB-C (+59.50), Unprogrammed (+$0.00) |
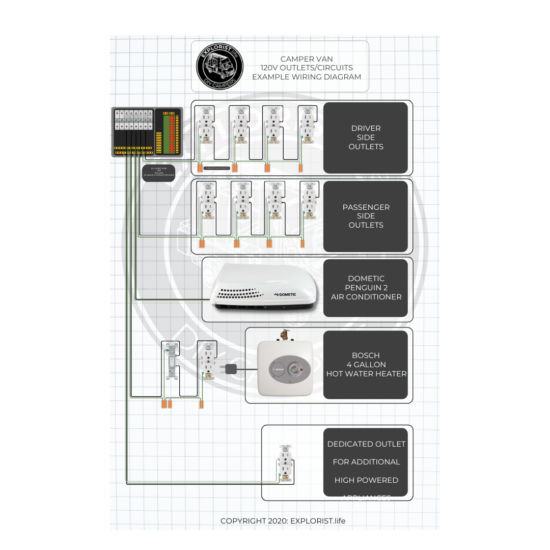
120V AC Distribution Panel Wiring Kit
| Weight | 8 lbs |
|---|---|
| Dimensions | 10 × 10 × 4 in |
| Choose Your Wire Length: | 10ft, 15ft |
| Choose Your Inverter/Charger Type | MultiPlus, Quattro, Multiplus-II 2x120V |
| Wiring Kit Application | Fuse Panel/Breaker Box |
| Breaker Box Type | 120V AC Distribution Panel, 120V AC Miniature Breaker Box |
120V AC Distribution Panel - 8/16 Circuits
| Weight | 3 lbs |
|---|---|
| Dimensions | 12 × 10 × 4 in |
| Max Amperage Output | 50A |
12V DC Fuse Panel
| Weight | 2 lbs |
|---|---|
| Dimensions | 10 × 5 × 2 in |
Victron Orion 24/12-70A Converter Wiring Kit
| Weight | 3 lbs |
|---|---|
| Dimensions | 10 × 10 × 2 in |
| Wire Length | 10ft |
| Wiring Kit Application | DC-DC Converter, Fuse Panel/Breaker Box |
12V DC Fuse Panel Wiring Kit
| Weight | 3 lbs |
|---|---|
| Dimensions | 10 × 10 × 2 in |
| Choose Your Kit: | 12V Fuse Panel Kit – 10ft, 12V Fuse Panel Kit – 15ft, 12V Fuse Panel for Smart Battery Protect Kit – 10ft, 12V Fuse Panel for Smart Battery Protect Kit – 15ft |
| Wiring Kit Application | Fuse Panel/Breaker Box |
Victron Orion 24|12 70A DC-DC Converter
| Weight | 2.5 lbs |
|---|---|
| Dimensions | 2.6 × 3.5 × 7.7 in |
Chassis Ground Wire Kit
| Weight | 4.5 lbs |
|---|---|
| Dimensions | 10 × 10 × 2 in |
| Select Your Ground Wire Size: | 1/0 AWG |
| Wiring Kit Application | Chassis Ground |
Victron SmartSolar MPPT 100|30
| Weight | 3 lbs |
|---|---|
| Dimensions | 8 × 5 × 3.75 in |
| Max Input Voltage | 100V |
| Max Amperage Output | 30A |
| Battery Bank Voltage | 12V, 24V |
| Max Wire Size | 6 AWG |
Victron SmartSolar MPPT 100|30 Wiring Kit
| Weight | 2 lbs |
|---|---|
| Dimensions | 10 × 10 × 2 in |
| Max Input Voltage | 100V, 150V, 250V |
| Max Amperage Output | 30A |
| Battery Bank Voltage | 12V, 24V |
| Max Wire Size | 6 AWG |
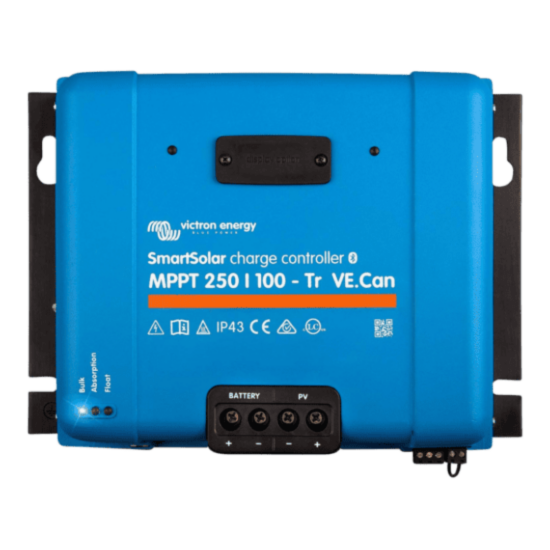
Victron SmartSolar MPPT 250|60
| Weight | 12.5 lbs |
|---|---|
| Dimensions | 13.5 × 11.5 × 6.5 in |
| Max Input Voltage | 250V |
| Max Amperage Output | 85A |
| Battery Bank Voltage | 12V, 24V, 36V, 48V |
| Max Wire Size | 2 AWG |
Victron SmartSolar MPPT 250|60 Wiring Kit
| Weight | 4 lbs |
|---|---|
| Dimensions | 10 × 10 × 2 in |
| Battery Bank Voltage | 12V, 24V, 36V, 48V |
| Max Amperage Output | 60A |
| Max Input Voltage | 250V |
| Max Wire Size | 2 AWG |
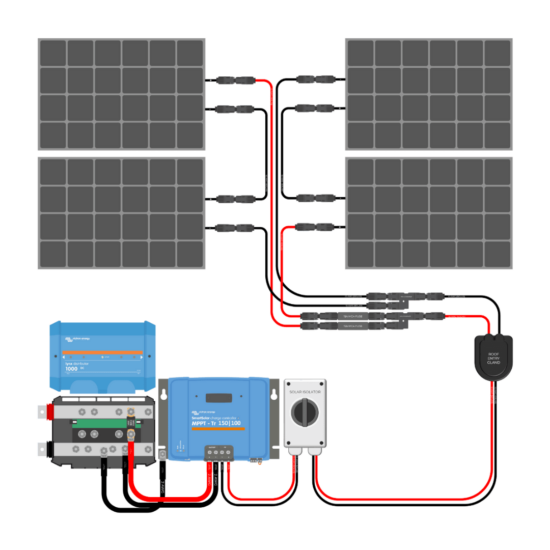
Solar Array Wiring Kit (Single/Dual/Ground Deploy Array Options)
| Weight | 2.5 lbs |
|---|---|
| Dimensions | 10 × 10 × 4 in |
| Choose Your Array Type: | Single Roof Array, Dual Roof Array, Roof and Ground Deploy Arrays, Single Roof Array for OEM Solar Ready, Add-On Ground Deploy Array, Add-On 2nd Roof Array |
| Wiring Kit Application | Solar Array |
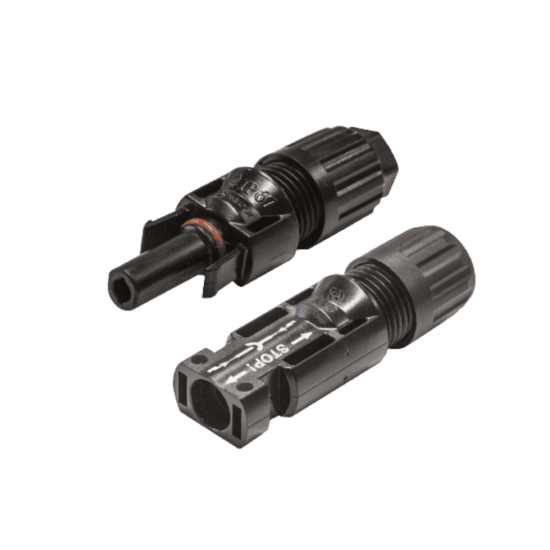
PV Connector
| Weight | 0.2 lbs |
|---|---|
| Dimensions | 4 × 1 × 1 in |
3-to-1 PV Branch Connector
| Weight | 0.4 lbs |
|---|---|
| Dimensions | 4 × 6 × 1 in |
10A PV Fuse
| Weight | 0.2 lbs |
|---|---|
| Dimensions | 4 × 1 × 1 in |
20A PV Fuse
| Weight | 0.2 lbs |
|---|---|
| Dimensions | 4 × 1 × 1 in |
10 AWG Solar Wire
| Weight | 0.2 lbs |
|---|---|
| Dimensions | 10 × 10 × 0.1 in |
| Feet | 10 ft., 20 ft., 30 ft., 40 ft., 50 ft., 60 ft., 70 ft., 80 ft., 90 ft., 100 ft. |
Rich Solar Mega 200 Watt 12 Volt Solar Panel
| Weight | 26.5 lbs |
|---|---|
| Dimensions | 58.7 × 26.8 × 1.2 in |
| Solar Panel Wattage | 200W |
Rich Solar Mega 55 Watt 12 Volt Solar Panel
| Weight | 8.8 lbs |
|---|---|
| Dimensions | 25 × 20 × 1.2 in |
| Solar Panel Wattage | 55W |
Rich Solar Mega 35 Watt 12 Volt Solar Panel
| Weight | 5.5 lbs |
|---|---|
| Dimensions | 33 × 9.5 × 1.2 in |
| Solar Panel Wattage | 35W |
30 Amp Shore Power Wiring Kit – Black Inlet
| Weight | 2 lbs |
|---|---|
| Dimensions | 6 × 6 × 4 in |
| Select Your Inverter/Charger: | MultiPlus |
| Wiring Kit Application | Shore Power |
30 Amp Shore Power Cord - 25'
| Weight | 7.5 lbs |
|---|---|
| Dimensions | 11 × 11 × 4 in |
15 Amp to 30 Amp Power Adapter Plug
| Weight | 0.2 lbs |
|---|---|
| Dimensions | 3 × 3 × 3 in |
Victron Cerbo GX MK2
| Weight | 0.875 lbs |
|---|---|
| Dimensions | 5.63 × 3.07 × 1.89 in |
Victron GX Touch 70
| Weight | 2 lbs |
|---|---|
| Dimensions | 10 × 7 × 5 in |
Victron GX Touch 70 Wall Mount
| Weight | 1 lbs |
|---|---|
| Dimensions | 10 × 7 × 5 in |
RJ45 Cable from Inverter/Charger to Cerbo GX:
| Weight | 1 lbs |
|---|---|
| Dimensions | 6 × 6 × 4 in |
| Length | 0,3m, 0,9m, 1,8m, 3m, 5m, 10m |
RJ45 Cable from Lynx Shunt to Cerbo GX:
| Weight | 1 lbs |
|---|---|
| Dimensions | 6 × 6 × 4 in |
| Length | 0,3m, 0,9m, 1,8m, 3m, 5m, 10m |
VE.Direct Cable from Primary MPPT Charge Controller to Cerbo GX:
| Weight | 1 lbs |
|---|---|
| Dimensions | 6 × 9 × 1 in |
| Length | 0,3m, 0,9m, 1,8m, 3m, 5m, 10m |
VE.Direct Cable from Secondary MPPT Charge Controller to Cerbo GX:
| Weight | 1 lbs |
|---|---|
| Dimensions | 6 × 9 × 1 in |
| Length | 0,3m, 0,9m, 1,8m, 3m, 5m, 10m |
Cerbo GX Mounting Hardware
| Weight | 0.1 lbs |
|---|---|
| Dimensions | 2 × 2 × 0.2 in |
Dual Victron Orion-TR Smart 12-24-15 DC to DC Charger Wiring Kit
| Weight | 15 lbs |
|---|---|
| Dimensions | 10 × 10 × 4 in |
| Wire Lentgh | 40ft |
| Wiring Kit Application | Alternator Charging |
Victron Orion Tr-Smart 12V-24V | 15A Isolated DC-DC Charger
| Weight | 4 lbs |
|---|---|
| Dimensions | 8 × 3 × 4 in |
Victron SmartShunt 500A
| Weight | 1 lbs |
|---|---|
| Dimensions | 6 × 6 × 4 in |
540Ah Battery Bank - 3000W 24V MultiPlus - 580w-1700w Solar Wiring Diagram EXPLORIST.life 2021 Ford Transit Camper Van
| Inverting Capacity | 3000 VA |
|---|---|
| Application | YouTube Project – 2021 Ford Transit |
| Shore Power Amperage | 30A |
| Battery Bank Voltage | 24V |




Nathaniel Stephens (verified owner) –
Truly couldn’t say enough great things about EXPLORIST.life and this entire product package!! As a first-time van builder, the world of electricity seemed daunting, however, after stumbling across Nate & Steph’s detailed video series on YouTube I was confident this would be the best direction. In addition to the top-notch tutorial video and extremely well-organized shipment, they’ve been there every step of the way to answer questions and provide guidance on a couple of ‘oopsie’ or ‘rookie mistakes’ I made during the planning process. Oh so grateful for folks like Nate & Steph and will be looking to their shop for any of my future van-building needs. Cheers!